

Annonces 512
Alerte nouvelle annonceForums Future Retro 512
News
Images


Fiche technique
- Fabricant : Future Retro
- Modèle : 512
- Catégorie : Autres claviers maîtres MIDI
- Fiche créée le : 09/10/2015
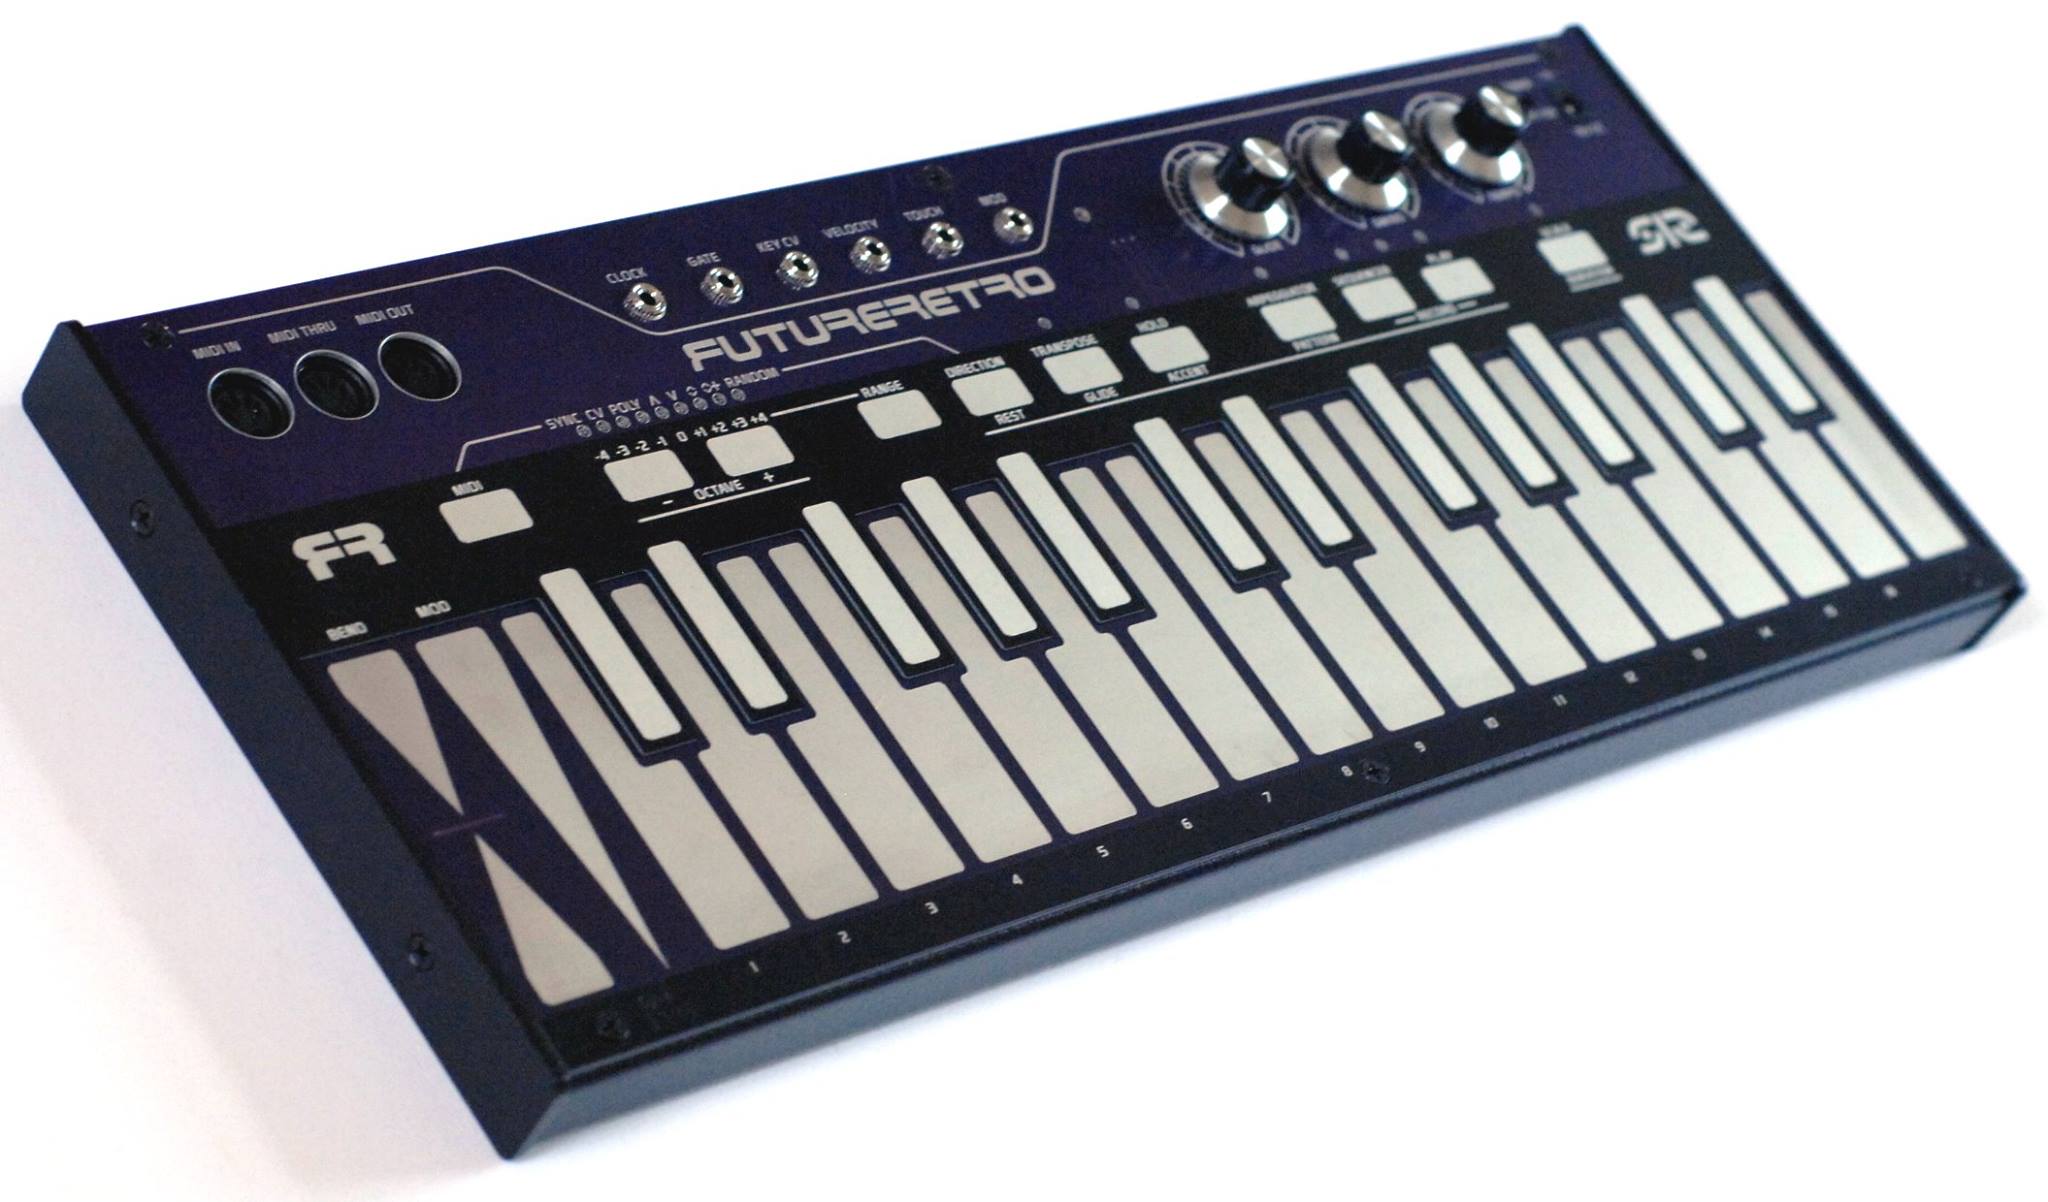
clavier MIDI/CV sensitif 2 octaves avec points de patch
MIDI IN
The MIDI IN jack on the front panel can be connected to the MIDI Out of your DAW, MIDI controller, or sequencer.
MIDI THRU
The MIDI THRU jack on the front panel will transmit all data that is received at the MIDI IN jack without latency. Use this when you need to daisy-chain multiple devices together.
MIDI OUT
The MIDI OUT jack on the front panel can be connected to the MIDI IN of your DAW, sound module, or other sequencers.
CLOCK
The CLOCK output provides a 0 to +10v analog clock signal that can be used to clock external analog modules, sequencers, or trigger envelopes. This clock will vary its timing based on whatever time signature is selected in the 512. This clock will also shuffle its timing based on settings of the SWING control.
GATE
The GATE output provides a 0 to +10v positive polarity gate signal, and is typically used for triggering envelopes in an analog synthesizer.
KEY CV
The KEY CV output provides an analog voltage in the range of 0 to +9.5v (approximately), and follows the 1v/Oct CV standard. You will typically connect this output to the CV control input of an analog synthesizer’s oscillators.
VELOCITY
The VELOCITY output provides an analog voltage in the range of 0 to +10v based on how quickly your finger approaches a key, and how much surface area of your finger makes contact when a key is first struck. This control voltage can be used to alter various aspects of an analog synthesizer.
TOUCH
The TOUCH output provides an analog voltage in the range of 0 to +10v based on how much surface area of your finger is in contact with a key at any time. This control voltage can be used to alter various aspects of an analog synthesizer.
MOD
The MOD output provides an analog voltage in the range of 0 to +10v based on how much surface area of your finger is in contact with the MOD pad. This works similar to a mod wheel found on traditional instruments, and can be used to alter various aspects of an analog synthesizer.
POWER
The 512 comes with a universal (center positive) +15V DC output power supply capable of being used with power mains ranging from 100-240V AC, this allows the unit to be used anywhere in the world simply by using the correct power plug type with the adapter.
KEYBOARD
The 512 will default to Keyboard mode each time the power is turned on. As you can see the keyboard provides 29 keys you can play. The keyboard will produce Velocity values based on how quickly your finger approaches a key and how much surfaces area of your finger makes contact with a key when a key is first played. Once a sound is playing you can vary the TOUCH amount by altering the amount of contact your finger has with the key. This will also affect the amount of After Touch sent via MIDI.
You can bend a note’s pitch up or down using several techniques touching the Up or Down BEND pads. You may wish to slide your finger up and down as though you were using a traditional pitch bend wheel. You can also vary a touch’s pressure, similar to proportional pitch control. Alternatively you can make the initial touch with your finger tip, then roll your finger onto the pad so more area of your finger is in contact with the pad.
You can change the octave the keyboard plays in by pressing the -/+ keys.
ARPEGGIA TOR
Want to get a taste of the arpeggiator? Press the ARPEGGIATOR key, it’s LED will light to indicate the Arpeggiator mode is selected. Press the PLAY key to start the arpeggiator, then press and hold various notes to on the keyboard. Vary the GLIDE, SWING, and TEMPO controls to get a feel for what they do.
To stop the arpeggiator, simply press the PLAY key again.
To return to the Keyboard mode, press the ARPEGGIATOR key turning it’s LED off.
DISPLAY LEDS
From here on, the manual will refer to the 9 LED’s above the -/+ keys as the “display LED’s”, as these LED’s are used to show various values and selections for parameters being edited.
Distribué par mesi
Autres catégories dans Claviers maîtres MIDI


Autres dénominations : fr512